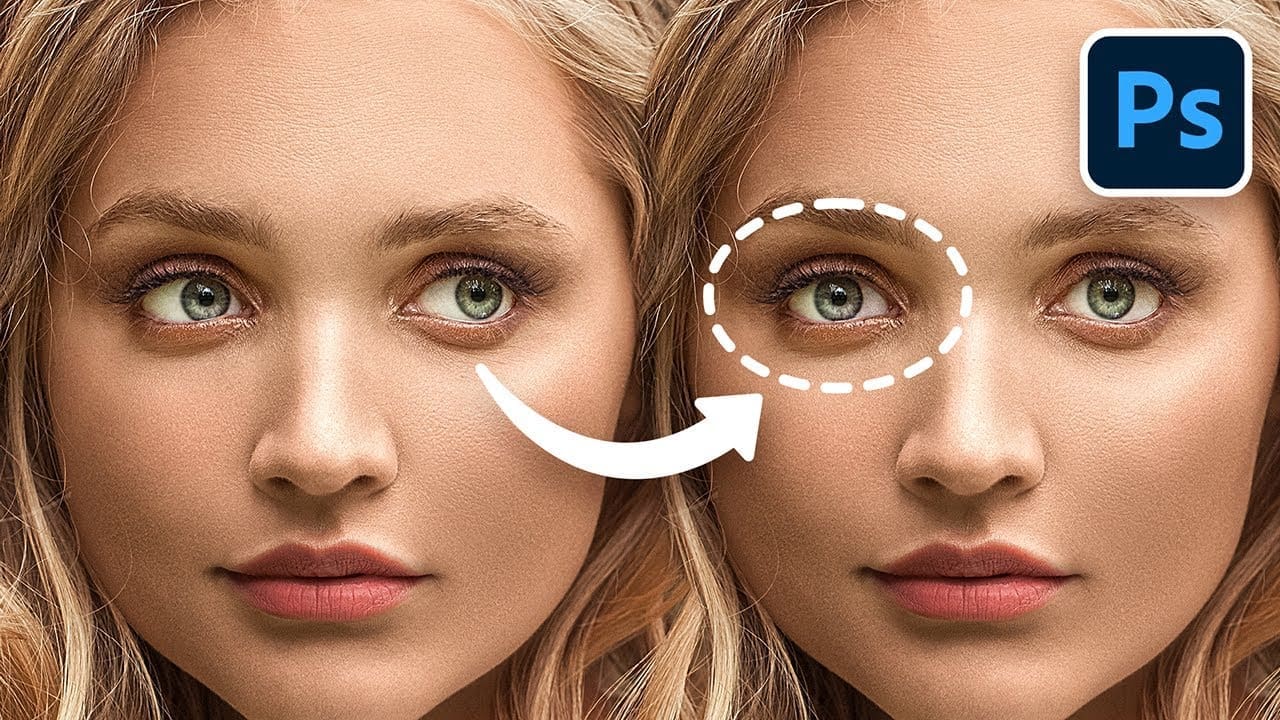
Mastering the Art of Changing Eye Direction in Photoshop
In the ever-evolving world of photo editing, Photoshop remains the gold standard for transforming good images into great ones. Whether you’re a professional photographer or a passionate hobbyist, at some point, you might face a common challenge: correcting the direction of your subject’s eyes to ensure they’re looking straight at the camera. This guide will walk you through two invaluable Photoshop tricks to change eye direction seamlessly, ensuring your subjects always look their best.
Understanding the Basics
Before diving into the complexities of eye direction correction, it’s essential to grasp why this minor adjustment can have a significant impact on your photos. Eyes are the windows to the soul, and when your subject’s gaze meets the viewer’s directly, it creates a connection that’s both engaging and compelling. However, capturing this perfect alignment isn’t always possible during the shoot — be it in group settings where someone might look away at the last moment or in detailed portraits where the eye position needs tweaking post-shoot.
The Simple Shift: Correcting Eye Direction in Group Photos
The first trick is particularly useful in group photos where not everyone might be looking at the camera. This scenario is less daunting since the details required are minimal due to the distance from the camera to the subjects. Using the lasso tool, you can easily select the eyes and duplicate them onto a new layer. With a few simple adjustments using the move tool, the direction can be corrected. To blend the eyes seamlessly into the original image, painting over any mismatches with a sampled color at a reduced flow can make a significant difference. Remember, the devil is in the details, so utilizing tools like the eraser to remove any excess is crucial for a natural look.
Advanced Adjustments: Detailed Eye Direction Correction
For portraits requiring a more detailed approach, the same basic principles apply, but with an added layer of complexity. After selecting and duplicating the eyes onto a new layer, precise transformations are necessary. Here, effective masking is your best friend — it allows you to blend the adjusted eyes with the original image seamlessly. However, some areas might not look perfect after the initial adjustment.
This is where tools and features like generative fill come into play, especially in the latest Photoshop versions. Generative fill can be a game-changer for fixing problematic areas around the adjusted eyes, offering options to seamlessly integrate the changes. And for those final touches, the remove tool, set to sample all layers, helps in cleaning up any discrepancies, ensuring the gaze direction looks natural and unaltered.
Enhancing Your Photoshop Skills
While mastering eye direction changes in Photoshop, it’s beneficial to explore resources that can elevate your photo editing skills. Platforms like Luminar Neo offer intuitive tools for photo editing, while Envato Elements and GraphicRiver provide a wealth of graphic assets and tutorials to inspire your next project. For those looking to showcase their work professionally, Placeit offers mockups and design templates, and for exclusive deals on digital products, Dealjumbo is a treasure trove worth exploring.
In conclusion, changing the direction of a subject’s eyes in Photoshop can significantly enhance the impact of your photos, making them more engaging and professional. By mastering these tricks, you’ll be well-equipped to tackle one of the most common challenges in photo editing, ensuring your subjects always look their best. Keep practicing, keep exploring, and most importantly, keep creating.
Downloads
1. Sample Image
Timestamps
00:00 What NOT to Do
00:42 Technique 1 – For Less-Detailed Photos
03:02 Technique 2 – For High-Detailed Photos
07:18 Cleanup and Finishing Touches
09:06 Quick Recap
09:34 Major Announcement


@donjames5761
you're like the brad pit of youtube
@thorstenpenz1400
👍
@Ronin_Wrath
5:25 "captain jack sparrow version" haha u got me boss
@BazzilioSPb
I don't know why, but every neural filter for face works terrible in my PS.
@Dwarister
Most possibilities with eyes into liquify tool except eyes direction
@-ASHRAF-
0:16 the design is very human 😂😂😂😂
@kathiepainthorse3646
how on earth did you read my mind!! I was just about to type this into Youtube. I worked with a vision impaired model last weekend and it was very difficult to get her line of vision directly into the lens. Thank you so much for sharing so much of your knowledge.
@kwna838
❤
@TheCynicalNihilist
this is also great if you have to fix someones photo who has a lazy eye
@alirax4058
Thank you so much
@artmaltman
What was wrong w the neural filter version? I am looking in iPhone so maybe my screen was not big enough to see. Thank you.
@SonySteals
This is some creepy sht 😂😂
@Gihozopatrick-cu5ly
I'm glad to see u again 😭
@radoo86
very nice, and usefull
@riddhimandas7058
Dude have find way accidentally for him and now it's tutorial 😂 it can also save your future gf from looking up on other girls 😃
Great video as always ❤
@xNULNULx
Since Vtubers are trending these days and in high demand, it would be awesome if you had a full tutorial on how to properly cut and organize character parts in Photoshop before uploading them to Live2D.
@HistoryXt
bro fixing stuff i don't even see
@sanb3586
The first time he is using actual quality photos people are actually editing in photoShop 😂😅
@Atechet
CAPTAIN JACK SPARROW VERSION, best line in the episode
@AjaySharma-po2yy
❤❤ Sir please…..
Share name of screen recorder you are using…..
@eldimo
Thank you very much!
@jorgefiocchi
You are a Genius!!! 👏👏👏
@GFXgrow
This is your golden words
. . . " keep creating ". . .
@cinemaousally7878
Sir i am beginner in ps and i am facing issue of drang and drop can u fix it or give any suggestion
@user-im8jq8xe9g
thanks random photoshop expert guy
@TwoDudeGamesChnnel
Great video! But I want to add something you didn't mentioned… Eyes iris physically stick out a bit, that causes skin to stretch in the direction person is looking in. So ideally you also need to use liquify to correct the shape of eyeholes.
@DaleSteadman
Welcome to Colorado, you should check out Garden of the Gods while you are there.
@greenday1guitarfreak
Bro you are a lifesaver